When it's cold out, my go-to dinner is always some sort of soup. Not only is it a great way to warm up, but it can also help you clean out leftover ingredients from your pantry and fridge, which is exactly how this soup came to be!
My favorite part about this recipe is the broth, especially the little pools of it that get trapped in the shell pasta. Since I eat dairy-free, I'm not able to create creamy thick soups. Instead I love to combine vegetable broth with tomato sauce to give it a bit more of a punch. But you could easily leave out the tomato sauce for a thinner broth or substitute it with milk or heavy cream for a creamier broth.
The first thing you want to choose for this soup is a good italian style rope or link sausage. My family eats a lot of chicken and turkey sausage, so my preferred one for this recipe is the Gilbert's brand Caprese Chicken Sausage, but really any sausage will do. Just make sure that it is one you can slice into 1 inch rounds and the casing will hold the meat into a nice disc.

Once you have your sausage sliced, you will saute them in your soup pot or dutch oven with a little olive oil and your sliced mushrooms until the sausages have started to brown and the mushrooms have cooked down to half their size. Toss in the rest of your ingredients except for the pasta and bring everything to a boil. Then you are ready to add your shell pasta and simmer just long enough for it to be al dente, making this a great recipe for nights when you need a quick dinner.
If you give this recipe a try, I would love to hear what you thought of it in the comments below!

|
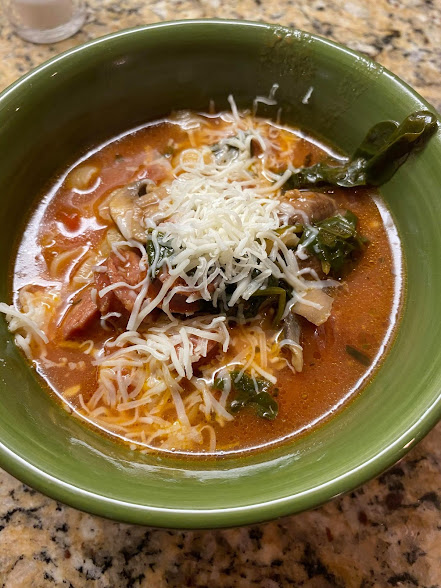
Italian Sausage Soup |
|
Ingredients: 10 oz of Italian style rope or link sausage (sliced into 1 inch rounds) 8 oz of white or baby bella mushrooms (sliced) 2 tablespoons of olive oil 2 garlic cloves (crushed) 48 oz of vegetable broth 15 oz of tomato sauce 14.5 oz of diced tomatoes 3 oz of baby spinach (torn) 1 tablespoon of Italian seasoning 8 oz of small shells pasta (uncooked) salt and pepper to taste Shredded parmesan for serving (optional)
Makes 5 servings |
|
Directions: 1. Heat olive oil in large pot or dutch oven over medium heat. 2. Add sliced sausage, mushrooms and crushed garlic. Saute until sausage has started to brown and mushrooms have reduced to half their size. 3. Add in all ingredients but the pasta and parmesan. Stir to incorporate and bring to a boil. 4. Once boiling, add the pasta and reduce to a simmer. Cook for 6-7 minutes until pasta is al dente. 5. Top with shredded parmesan if desired and serve. |